 |
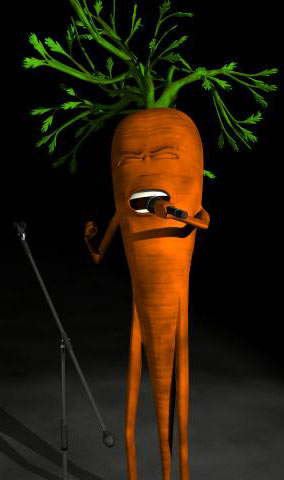
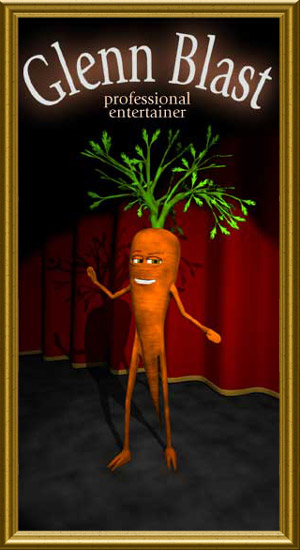
Download movie (1min 55sec): This is Glenn Blast. He's a professional entertainer. Ever since he was pulled out of Henry's back yard garden, he has felt agony over his situation. To lose family and friends from the happy soil times isn't very easy for a carrot, and he can be quite frustrated over the fact. Now he's all by himself and would be very happy to join his kind... wherever they are. Or. Actually, he's a helping hand for me to explore my animation talents. Since I finished my education in 3D-graphics almost three years ago I've been working at an advertising agency and later with computer game production. But I've always felt there's a couple of obvious holes in my portfolio that needed to be filled. Such as a real character setup, with waving arms and lipsync. So, by the end of febrary I started to think about how to make a short film with a character talking and expressing emotions with a few controls. So Glenn Blast's performance here is really my first character setup and animation of it. As said, I started by the end of february and could, since I'm out of a job for the moment, spend full time at the project. I finished editing last friday, wich makes 40 days or around 300 hours of production time, from the first cone geometry to the last end title. That may sound like a long time, but since it was a personal project I'd only an emotional deadline and felt free to bend the project time to tweak and change whenever I needed. Besides, this is quite time-consuming work, first designing the damn vegetable and then animating it. |
The idea of a singing carrot
came actually as a cooperation between me and my ex girlfriend, Malin.
I saw Victor Navone's alien
Blit singing 'I will survive' and thought that was a great way to
test one's character animation abilities. Therefore, I was looking
for a good song and a idea for a What about the ending? Well, Glenn is a carrot. You eat carrots. That’s my hands, by he way. And the sound of me eating a carrot. The name Glenn Blast then? I thought Glenn (yes, with two n) is silly enough for a professional entertainer as this. Blast may be his catchy way of trying to be a cool artist. For me it’s just even more silly. Also, 'blast' in swedish means that green stuff on top of, for example, a carrot. The tools that I've used are Maya for modeling, setup, animation and rendering, Adobe Photoshop for the texture maps, Digital Fusion for some post processing (depth blur), Adobe Premiere for cutting the clips together, and Adobe Audition (former Cool Edit Pro) for some sound effects. An, of course, pen and paper.
The eyes is two spheres with textures attached to them (wow, I wonder how I came to think of that!). The eyelids are a couple of semi-spheres rotating around the eye spheres. I followed a tutorial to make the eye's texture (unfortunately, I've lost the link to that tutorial, but you can find a few similar only by searching for 'eye texture tutorial' at Google). There's also a specular map attached to the eyes so they refects light differently depending on the texture. There should really be more to the eyes when it comes to shading (an extra semisphere for the pupil etc), but this was good enough for me. There is also an aim constraint on a locator that Glenn always is looking at. Since I modeled the carrot's arms
by extruding faces from the boy, and the legs separately, I had
Technobabble: For each mouth positition blend shapes I created a clip in the character set for the mouth. Then, using my exposure sheet notes, I created instances of the different clips onto the trax editor timeline, to form Glenn's mouth correctly at the exact moments. Creating blend connections between the clips made smooth transitions between the mouth shapes, but they still looked quite stiff and automated. To improve that, I should've put another layer with secondary animation curves on top of the mouth clips, which I never did. That's why his mouth movements looks a little bit stiff when he sings. I'll do better next time. To complete the lip sync, not counting the breaking down of the song on the exposure sheet, took only one day and a half! Adding two layers with additional expression animation around the eyes and mouth took another two days. When the lipsync of the lyrics and
the facial expressions was done, I build the skeleton, from the
tail and feet to the arms & hands, top of the head and haulm.
The hands was even simplier than Blitz's, like a glove. Which means
it's easier to animate, but on the other hand less expressive. I
made IK handles and a couple of driven keys to reduce the amount
of joints I had to control. I painted the skin wieghts so that his
skin should crease nicely, not affecting the wrong parts of his
body. At this point I tried to use a wrap deformer technique instead
to get nice deformation at elbows and armpits. But Glenn was to
heavy (too many polygons), so I had to abandon that and do it the
old-fashion way. That's another thing I'll do better next time. Christer tipped me about a script that I used for the haulm. The script uses goal weights to get the branches to wobble back and forth and side to side, reacting to one spine joint and to each other, respectively. That gave Glenn some nice secondary animation. The tail is also scripted that way, though in a more discreet way. I don’t want him to wag his tail to much. That may steal attention. I don't want this film to be rated NC-17. By then it was time to animate the
arms, wrists and the spine. That was done in a couple of days, including
tweaking and and polishing the animation. But it was great fun to
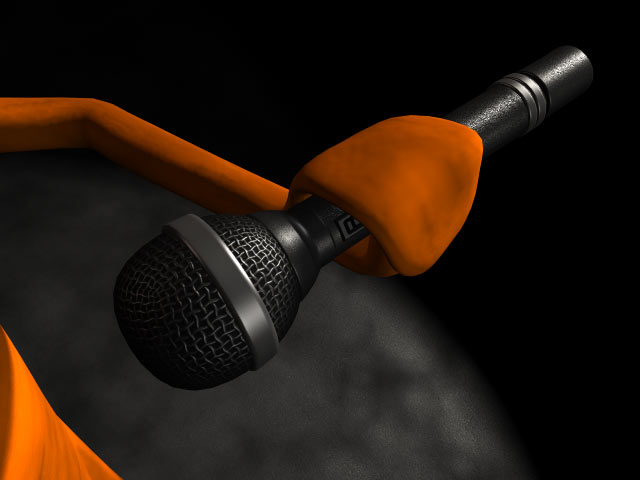
do the parts that, in my opinion, looks best in the film –
for example when Glenn takes the steps to grab the microphone and
shuffles the microphone stand aside. When I thought his movements were OK, I added a few cameras, animated some of them and rendered quick screen (playblasts) previews from every camera. Before that I animated the eyes aim object, so he looks into the cameras that I think I will use. Then I brought the previews into Adobe Premiere and and did a test edit. When I was satisfied with that I wrote down which cameras should be rendered when, fixed some animation details that needed to be done, wrote a few lines of render que, and hit enter. Crossing my fingers didn’t help. Of course I had to re-render some of the clips because suddenly the right arm’s IK handle animaion curve had changed, causing the elbow to break in a scary way sometimes. Plus a couple a camera animations that needed to be changed. When finally all the clips were rendered, I imported them one by one into Eyeon Digital Fusion to add some depth blur, since I’d rendered the images with a Z-channel included. Rendered again, I brought everything into Adobe Premiere and cut everything together. And the rest isn’t history, yet. Oh, I also spend an evening making the few sound effects for the end of the film. Once again, this is the first time I’ve build, rigged and animated a complete character. (I gave character to a couple of bicycles once, but that's not the same thing.) If you managed to read through everything above (congratulations!), you can see that I did everything from scratch to end with not much testing or external reviewing. Maybe that’s wrong, but it's a way to figure out how good I am at this. As a result, Glenn Blast may seem a little bit stiff on stage. I know he doesn’t move around much. That may be because I’ve been careful (or afraid?) not to exaggerate his movements, since that sometimes results in ugly and unrealistic animation. Besides, at that point I was eager to get to the next step in the project. Next time I’ll be more bold and patient at the same time. With Glenn and/or with another character. I promise.
Here's some more pictures... |
|

 to
spend a couple of days straighten up the UV's. Foolish me. That
together with me being such a perfectionist (sometimes). The body
texture, as well as the bump map was hand-painted in Photoshop,
with the UV grid in the foreground. The haulm texture wasn't even
painted, just generated. If you look close enough (well, you don’t
HAVE to) you can se some splices in the texture.
to
spend a couple of days straighten up the UV's. Foolish me. That
together with me being such a perfectionist (sometimes). The body
texture, as well as the bump map was hand-painted in Photoshop,
with the UV grid in the foreground. The haulm texture wasn't even
painted, just generated. If you look close enough (well, you don’t
HAVE to) you can se some splices in the texture. Then
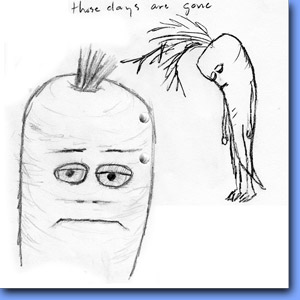
I created a bunch of blend shapes for the facial animation.
The eyebrows, the forehead, the upper cheek, the mouth and parts
around it, the "nose", had to be combined in order to
give Glenn the expressions he needed. I also created the seven basic
mouth position to form the words. You really don't need any more
for this kind of animation.
Then
I created a bunch of blend shapes for the facial animation.
The eyebrows, the forehead, the upper cheek, the mouth and parts
around it, the "nose", had to be combined in order to
give Glenn the expressions he needed. I also created the seven basic
mouth position to form the words. You really don't need any more
for this kind of animation.